วันพฤหัสบดีที่ 4 กรกฎาคม พ.ศ. 2556

Those Who Sent Mails To picta55@gmail.com

Saturday, June 1, 2013

Those Who Sent Mails To picta55@gmail.com

 Teacher  Phaitoon  Yaemprasuan
Teacher had reviewed his Gmail inbox, picta55@gmail.com, then captured the names of those who had sent their e-mails to this mail box. The list has been sorted by ascending from earlier date. On the day after Teacher is going to delete all of these received mails, please do not send any message of yours to this mailbox anymore. Because the time to send is over.
ครูผู้สอนได้ไปดูเมล์ picta55@gmail.com และทำการจับภาพรายชื่อนักเรียนที่ส่งเมล์มาหา โดยเรียงลำดับส่งก่อน/ส่งหลัง  หลังจากวันนี้ไปแล้วครูผู้สอนจะลบเมล์ทั้งหลายออก กรุณาอย่างส่ง message มาอีก เพราะหมดเวลาให้ส่งแล้ว

page 1


May 14-15


May 16-18

page2


page3


page4


page5


page6


page7


page8


page9


page 10

page 11


page 12


Teacher would like to admire the energetic students who are responsible for his assignments both e-mail message confirmation and blog creation. Another expectation of the teacher is to see you transfer your know-how to your other friends who are dragging behind. If you could help them building their blogs, they would go on themself.

Those Who Sent Mails To picta55@gmail.com

Saturday, June 1, 2013

Those Who Sent Mails To picta55@gmail.com

 Teacher  Phaitoon  Yaemprasuan
Teacher had reviewed his Gmail inbox, picta55@gmail.com, then captured the names of those who had sent their e-mails to this mail box. The list has been sorted by ascending from earlier date. On the day after Teacher is going to delete all of these received mails, please do not send any message of yours to this mailbox anymore. Because the time to send is over.
ครูผู้สอนได้ไปดูเมล์ picta55@gmail.com และทำการจับภาพรายชื่อนักเรียนที่ส่งเมล์มาหา โดยเรียงลำดับส่งก่อน/ส่งหลัง  หลังจากวันนี้ไปแล้วครูผู้สอนจะลบเมล์ทั้งหลายออก กรุณาอย่างส่ง message มาอีก เพราะหมดเวลาให้ส่งแล้ว

page 1


May 14-15


May 16-18

page2


page3


page4


page5


page6


page7


page8


page9


page 10

page 11


page 12


Teacher would like to admire the energetic students who are responsible for his assignments both e-mail message confirmation and blog creation. Another expectation of the teacher is to see you transfer your know-how to your other friends who are dragging behind. If you could help them building their blogs, they would go on themself.

What/How About Our Home Network is?


Tuesday, June 4, 2013


What/How About Our Home Network is?

by  Teacher  Phaitoon  Yaemprasuan  :  occupatech@gmail.com
                                   http://picta55.blogspot.com 
 

I have known from students of my computer classes that the Internet connection at their homes is of TOT provider. Yes, my internet service provider (ISP) is TOT too. What/how is my home network?  The modem-router is the main device of the network because it plays many roles as of the followings : -
   1) to simulate itself like a server computer
   2) to act as a hub/switch of the wired connection
   3) to be an access point sending packets of the wireless connection
   4) to play as an ADSL modem connecting Internet
   5) to be a router managing the how-to connect to other devices
ครูทราบจากนักเรียนหลายคนที่เรียนวิชาคอมพิวเตอร์กับครูว่า ที่บ้านของพวกเขามีการเชื่อมต่ออินเทอร์เน็ตผ่านผู้ให้บริการอินเทอร์เน็ต ทศท.(TOT) ซึ่งที่บ้านครูก็ใช้บริการของ ทศท.เหมือนกัน  แล้วระบบเครือข่ายที่บ้านเราจะเป็นแบบไหน?  อุปกรณ์หลักก็คือ โมเด็ม-เราเตอร์ (modem-router) ซึ่งอุปกรณ์นี้จะทำหน้าที่หลายบทบาทด้วยกัน คือ
   1) จำลองตัวเองเป็น server computer
   2) เป็น hub/switch ของการเชื่อมต่อแบบใช้สาย
   3) เป็น access point ทำหน้าที่ส่งแพ็คเก็ตส์ในระบบเครือข่ายไร้สาย
   4) เป็น ADSL modem เชื่อมต่อ Internet
   5) เป็น router บริหารจัดการเชื่อมต่อกับอุปกรณ์/คอมพิวเตอร์อื่นในเครือข่าย

Be sure, most of our home network is hybrid. One is wired while another is  wireless. Although a home network is not complex, but its system is so smart and its Internet connection is so clever with the ADSL technology. The superstar is a "modem-router", the genius device.
โฮมเน็ตเวิร์กที่บ้านส่วนใหญ่เป็นไฮบริด คือ ผสมกันทั้งแบบมีสาย (wired) และแบบไร้สาย (wireless)  แม้ว่าระบบโฮมเน็ตเวิร์กอาจจะดูไม่ซับซ้อนอะไรมาก  แต่ระบบเครือข่ายนี้ก็ไม่ไช่ธรรมดา การเชื่อมต่ออินเทอร์เน็ตก็ทำได้ดีด้วยเทคโนโลยี ADSL และแน่นอนว่า อุปกรณ์อัจฉริยะของระบบก็คือ"modem-router" นั่นเอง
The composition of any home network 
(e.g. home internet connection of students)

     UTP :  Unshielded Twisted Pair cables are so common in any computer rooms  e.g. classroom102 of our school. The UTP cable is caped with a connector which is called RJ-45. The RJ-45 connector will be inserted into the LAN port of any Ethernet card/router/switch/hub. (The RJ-11 connector of the phone line is smaller than RJ-45).
สายเคเบิลแบบยูทีพี (UTP) หรือสายคู่บิดเกลียวไม่หุ้มฉนวน (Unshielded Twisted Pair cables) จะพบได้ทั่วๆ ไปในห้องคอมพิวเตอร์ อาทิ ห้องเรียนคอมพ์102 ในโรงเรียนของเรา  UTP จะถูกเข้าหัวด้วยหัวต่อ หรือคอนเน็กเตอร์ (Connector) ที่เรียกว่า RJ-45  ซึ่งหัวต่อนี้จะถูกเสียบไว้ที่ช่องเสียสายแลน หรือแลนพอร์ต (LAN port)   เราเตอร์ สวิตช์ หรือฮับ  (ขณะที่หัวต่อ RJ-11 ของสายสัญญาณโทรศัพท์จะมีลักษณะเหมือนกัน แต่มีขนาดเล็กกว่า) 

 What is ADSL? (www.wikipedia.org) : It is "Asymmetric Digital Subscriber Line" technology. This is a data communications technology that enables faster data transmission over copper telephone lines than a conventional modem can provide. (Modem is a device that manages the joint communication between the phone and the computer.)
ADSL คืออะไร? (www.wikipedia.org สารนุกรมเสรี) อธิบายว่า "Asymmetric Digital Subscriber Line" technology.  เป็นเทคโนโลยีโทรคมนาคมที่ทำให้การส่งข้อมูลผ่านสายโทรศัพท์ที่ปกติจะเป็นสายทองแดงนั้น ทำได้ดีมีประสิทธิภาพมากกว่า การใช้โมเด็มธรรมดา (Modem เป็นอุปกรณ์ที่จะทำหน้าที่บริหารจัดการสัญญาณจากโทรศัพท์และสัญญาณจาคอมพิวเตอร์ให้มาทำงานร่วมกันได้)


Another one I would like to refer to is "protocol". What is it? A protocol is a system of digital message formats and rules for exchanging those messages in or between computing systems and in telecommunications. And in our network we use the TCP/IP (comes from "Transmission Control Protocol and Internet Protocol). Now Thailand uses IPv4 protocol, but Thai government by Prime Minister Yingluck  Shinawatra is going to change the Internet protocol of the country with another version, IPv6 protocol, which has more capacity and efficiency of transmission.  
 และมีอีกเรื่องที่ครูอยากจะพูดถึงก็คือ "โปรโตคอล" มันคืออะไร?  ถ้่าจะว่าไปนะ คำๆ นี้ มันเป็นภาษาที่ใช้ในวงการฑูตเขา คือกรณีที่ต้องมีการติดต่อสื่อสารกันระหว่างพวกฑูตของประเทศต่างๆ เขาก็จะต้องมีวิธีการ มาตรฐาน ระบบระเบียบต่างๆ ที่เข้าใจตรงกัน และเขาเรียกว่า protocol ทางวงการคอมพิวเตอร์ก็ไปขอยืมคำศัพท์ของเขามาใช้บ้าง  โปรโตคอลของเครือข่ายคอมพิวเตอร์ (www.wikipedia.org) ก็คือ ระบบของรูปแบบข่าว สารเชิงดิจิตอลและกติกา ของการแลกเปลี่ยนกันระหว่างระบบคอมพิวเตอร์และโทรคมนาคม  ซึ่งทุกวันนี้ โปรโตคอลที่เราใช้ในเครือข่ายนั้น คือ ทีซีพี/ไอพี (โปรโตคอลควบคุมการส่งข้อมูล และอินเทอร์เน็ตโปรโตคอล)  และ ตอน นี้รัฐบาลไทย ภายใต้การนำของ ฯพณฯ ยิ่งลักษณ์ ชินวัตร  ก็กำลังปรับเปลี่ยนอินเทอร์เน็ตโปรโตคอลของประเทศเรา ที่ขณะนี้เป็นเวอร์ชัน 4 ให้เป็นเวอร์ชั่น 6  เพื่อรองรับปริมาณของเครือข่าย และประสิทธิภาพที่ขยายเพิ่มขึ้น 

Because each computer of the network has its own unique "IP-address", what/how is it? As I have just told you (see, first paragraph) that the modem-router simulates itself like a server computer, sure its IPaddress must be static, e.g. (IPv4) 192.168.2.1, 192.168.1.1, 192.168.0.1 etc. , on the other hand it lets the other connected computer the dynamic/automatic IPaddress. Yes, the modem-router of the home network is the gateway to Internet.

เพราะเครื่องคอมพิวเตอร์แต่ฃะเครื่องในระบบเครือข่าย ต่างก็มีรหัสไอพี (IP-address) เฉพาะตัวไม่ซ้ำกัน  เหตุไฉน/อย่างไร?  ก็ตามที่ึรูได้กล่าวไปแล้วว่า  modem-router จะจำลองตัวมันเองเป็นเสมือน server computer  แน่นอนว่า ตัวมันเองก็จะต้องมีรหัสไอพีที่แน่นอนตายตัว อาทิ (ถ้าดูตาม IPv4)  192.168.2.1, 192.168.1.1, 192.168.0.1 ประมาณนี้  ในอีกทางหนึ่งมันก็ยอมให้เครื่องอื่นๆ ที่เป็นลูกข่าย/ลูกน้อง ที่มาเชื่อม่อเครือข่ายกับมันมีรหัสไอพีแบบอัตโนมัติ  ส่วนจะเป็นอะไรนั้นก็แล้วแต่มันจะจัดให้  แต่ก็มักจะเป็นรหัสที่ต่อเนื่องกับตัวมันนั่นแหละ  อาทิ 192.168.2.3 เป็นต้น เพราะตัวมันเองเป็นเครื่องเกตเวย์ 
Teacher's home network PC/Modem-router IPaddress Configuration
I use the "IPCONFIG" command to see what/how my home PC/modem-router IPaddress configuration by typing the command at the command line of Windows and what I knows are the followings 

... 192.168.2.1  is the IPaddress (IPv4) of my modem-router, Belkin brand.
... 192.168.2.3  is the IPaddress (IPv4) of my PC, configured by the modem-rounter 

ครูได้ใช้คำสั่ง ณ คอมมานด์ไลน์ของ Windows7 ว่า  IPCONFIG  เพื่อต้องการทราบว่า  รหัสไอพีของเครื่องคอมพิวเตอร์ และโมเด็ม-เราเตอร์ที่บ้่านมีค่าอะไร ก็พบว่า
... 192.168.2.1  เป็นรหัส IPaddress (IPv4) ของ modem-router, ยี่ห้อ Belkin 
... 192.168.2.3  เป็นรหัส IPaddress (IPv4) ของเครื่องคอมพิวเตอร์ ที่จัดให้/กำหนดให้โดย modem-rounter 

Yes, each other computer in the network can never be configured with a static IPaddress because the modem-router as the server PC/the gateway PC cannot share Internet connection anyway.
ใช่เลย คอมพิวเตอร์เครื่องอื่นๆ ในระบบโฮมเน็ตเวิร์ก มิอาจมีค่ารหัสไอพีแบบคงตัวได้  เพราะมันจะต้องถูกตั้งเป็นอัตโนมัติไว้ให้  modem-router ในฐานะเป็น server PC/the gateway PC เป็นตัวกำหนด  ถ้าไม่เช่นนั้น  มันจะไม่สามารถแชร์การเชื่อมต่ออินเทอร์เน็ตมาให้ได้นั่นเอง

วันอังคารที่ 2 กรกฎาคม พ.ศ. 2556

Visul Basic 6.0 : Exercise แบบฝึกหัด วิชวลเบสิก 6.0

Visul Basic 6.0 : Exercise แบบฝึกหัด วิชวลเบสิก 6.0

           Teacher  Phaitoon  Yaemprasuan  :   occupatech@gmail.com
                                                                http://picta55.blogspot.com


Exercise 1

Calendar/Time Display

1 Design a window application that displays the current month, day, and year.  Also, display the current time, updating it every second (look into the Timer control).  Make the window look something like a calendar page.  Play with object properties to make it pretty.

ให้นักเรียนออกแบบหน้าต่างแอ็ปปลิเคชัน ที่แสดงเดือนปัจจุบัน วันที่ และปี  และยังแสดงเวลา ณ ปัจจุบัน ที่จะอัปเดตทุกวิยาทีอีกด้วย (เหมือนกับนาฬิกาจับเวลา)  หน้าต่างแอ็ปปลิเคชันนี้จะคล้ายเหมือนใบปฏิทิน  และให้นักเรียนตกแต่งอ็อบเจ็กต์ต่างๆ ให้ดูดี


2 Configure the properties of the related objects like the followings.
 ทำการตั้งค่าต่างๆ ให้กับอ็อบเจ็กต์ที่เกี่ยวข้อง เหมือนค่าที่กำหนดมาให้ตามนี้

Configuration 1


Configuration2


Configuration3


3  Attach the source codes to the objects. There is only the Timer "timDisplay" object that we have to attach our source codes to.  Although there is no any variable declared, but we have to type the code "Option Explicit" at the General Declarations module.
 ทำการผูกซอร์สโค้ด (รหัสโปรแกรม) เข้ากับอ็อบเจ็กต์  สำหรับงานนี้จะมีเพียงอ็อบเจ็กต์ไทเมอร์ ที่ชื่อ timDisplay เท่านั้น ที่เราจะต้องใส่โค้ดผูกไว้

Source codes that we have to type.


วันอาทิตย์ที่ 23 มิถุนายน พ.ศ. 2556

รายชื่อ ม.2/6

        รายชื่อ

1. Kanit Pitthayanurk
2. Kanachai Sompansatit
3. Komtad Tusranont
4. Jakkrit Malithong
5. Jittakon Pukpun
6. Jirasin Yuwachat
7. Napat Sringam
8. Nattanon Yudee
9. Naratron Sawangsri
10 Bandit Boonsawang
11. Pakapol Ruengrit
12. Pakawat Ubonrat
13.
14. Phattarawat Chomngam
15. Pakpom Khlaidi
16. Wongsakorn Jongsomjit
17. Surachai Panutai
18. Adisorn Bandasak
19. Apisit Saban
20. Kittika Chaichueai
21. Kuntida Namuang
22. Kaimuk Heenkaew
23. Chirawadee Srisanam
24. Chanikan Rodchienglam
25. Titirat Namkang
26. Natthakita Srisukkwl
27. Naruemon Choksataporn
28. Nunnapus Plailahan
29. Panisara Soowannarat
30. Piyanut Phatbok
31. Pornsiri Yuenyong
32. Rapeeporn Santimalai
33. Wachirawan Chainobpawat
34. Warapon Nakwong
35. Warisa Keawshigam
36. Wassana Limsuwan
37. Wichitra Kerdlab
38. Sasinphat Saifahyanyong
39. Silaporn Amonmanorom
40. Supatchaya Phosee
41. Saranporn Sawangsri
42. Sirikon Maneejarern
43. Sumalinee Maneewong
44. Hirunyika Kanjana
45. Araya Khunnarong
46. Oranan Keawphanlueng

การแชร์โฟลเดอร์ เครื่องพิมพ์

Folder and Printer Sharing

  การแชร์โฟลเดอร์/เครื่องพิมพ์


The Atmosphere of My 2003 Computer Class at 4th Floor of Building1.
They were energetic and very nice schoolkids I have ever experienced.

บรรยากาศห้องเรียนคอมพิวเตอร์ 2546 สมัยยังอยู่ชั้น 4 อาคาร 1
พวกเขาเป็นเด็กนักเรียนที่ขยันขันแข็ง ตั้งใจเรียน และเป็นเด็กดีมากที่สุดรุ่นหนึ่งเท่าที่ครูเคยเจอ
All of us use Windows7 as the operating software, and our computers are connected together within the workgroup of the LAN (local area network). So we should gain the benefit of its sharing capability. Here we go!
ตอนนี้พวกเราล้วนแล้วแต่ใช้ Windows7 เป็นซอฟต์แวร์ระบบปฏิบัติการ (ในห้องเรียน และที่บ้านด้วย) และเครื่องของพวกเราก็เชื่อมต่อกันเป็นเวิร์กกรุ๊ปในระบบแลน ดังนั้นเราก็น่าจะใช้ความสามารถในการแชร์ทรัพยากรระหว่างกันได้ ลองดูกัน

1. FOLDER SHARING
การแชร์โฟลเดอร์

Be sure we have to specify what folder that we want to share?
ต้องระบุโฟลเดอร์ที่ต้องการแชร์


"BOOKS" is the folder of us to be shared.
โ
ฟลเดอร์ "BOOKS" คือโฟลเดอร์ที่เราอยากแชร์

Make a right clicking with the folder, the dialogue box appears. Select the "Sharing" tab and the "Advanced Sharing" button
คลิกขวาที่โฟลเดอร์ กรอบโต้ตอบจะปรากฏขึ้น เราก็เลือกแท็บ
"Sharing" และปุ่ม
"Advanced Sharing"


Now the folder has never been shared yet (Not Shared)
ตอนนี้โฟลเดอร์นี้มีสถานภาพไม่ได้ถูกแชร์ไว้

Properties window of the folder appears and we should select to share it with others. Now we can see the maximum number of users to simultaneously enter to the folder is 20. Then we can click on the "Permission" button.
จะปรากฏหน้าต่างพรอพเพอร์ตีส์ (คุณสมบัติ) ของโฟลเดอร์นี้ขึ้นมา และเราก็ต้องเลือกว่าจะแชร์กัน และจะเห็นว่า เพื่อนๆ จะเชื่อมต่อเข้ามาใช้โฟลเดอร์ของเราพร้อมกันได้เต็มที่ 20 เครื่อง แค่นั้น ต่อมาก็เลือกคลิกปุ่ม "Permission"

Tick the check-box, and we can change the share name or ignore it.
ติ๊กเลือกว่าจะแชร์ จะเปลี่ยน/หรือไม่เปลี่ยนชื่อที่จะแชร์ก็ได้

After clicking on the permission button, the Permissions window shows up, you can add any user e.g. "student" and you can change the permission type of the user.
หลังจากคลิกปุ่ม permission จะมีหน้าต่างโผล่มาให้เราปรับเปลี่ยนตามความต้องการ

We can add user/ specify his permission level.
เราสามารถเพิ่มยูสเซอร์ / ระบุระดับการอนุญาตใช้งานโฟลเดอร์ของเราแก่เขา

Finally click on the "Apply" button, the folder now has been shared.
เมื่อเราคลิกปุ่ม "Apply" โฟลเดอร์ของเราก็ได้รับการแบ่งปันให้ใช้ร่วมกันได้ในเครือข่ายแล้ว

Well, our folder has been shared.
Folder ของเราได้รับการแชร์กันใช้เรียบร้อยแล้ว

Sample Special
ตัวอย่าง


This is from my computer (Its hostname is "ALPHA00".), when I click on the "Network" (at the left pane of Windows7 "Computer explorer" ) some computer hostnames appears. Yes, I want to randomly select any hostname. If the target of mine is "KACHATUCH", yes I would make a double-click on it.
นี่เป็นคอมพิวเตอร์ของครูที่ห้องพักครู (โฮสต์เนมว่า ALPHA00) เมื่อครูคลิกเลือก Network (อยู่ตรงแถบซ้ายของหน้าต่าง Computer explorer ของ Windows7 ก็จะปรากฏโฮสต์เนมต่างๆ ในเครือข่าย แน่นอนว่า ครูก็คงต้องสุ่มเลือกเข้าไปใช้เครื่องใดสักเครื่อง ที่ครูเล็งไว้ก็คือเครื่องที่มีโฮสต์เนมว่า Kachatuch

My Target Hostname is "KACHATUCH"
เครื่องที่ครูเล็งไว้คือ โฮสต์เนมที่ชื่อว่า Kachatuch

The shared folders of the hostname will be appeared. Then we can do a random selection and we can find any other subfolders that we can select to use.
ตอนนี้ก็จะเห็นโฟลเดอร์ที่โฮสต์เนม Kachatuch เราก็คงต้องสุ่มเลือกโฟลเดอร์ แล้วเราก็จะเห็นโฟลเดอร์ย่อยๆ ที่เราสามารถจะเลือกเข้าไปใช้ได้

The Shared Folders of "Kachatuch" appears, any folder could be selected.
If any shared folder had been selected its subfolders would be revealed.

แชร์โฟลเดอร์ของโฮสต์เนม "Kachatuch" ก็จะปรากฏขึ้นมาให้เห็น เราสามารถเลือกโฟลเดอร์ไดก็ได้
ถ้าแชร์โฟลเดอร์ใดถูกเลือกเข้าใช้ โฟลเดอร์ย่อยๆ ก็จะได้รับการเปิดตัวออกมาให้เห็นฝเลือกใช้ได้


2. PRINTER SHARING
การแชร์พรินเตอร์


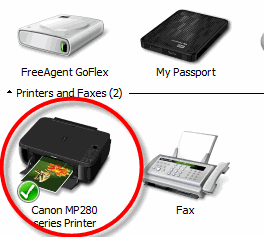
Click the "Start button" of Windows7 desktop, the pop-up menu appears, then select "Devices and Printers", the target printer of us will be appeared.
จากปุ่ม Start ของ Windows7 เราก็เลือก "Devices and Printers" ก็จะเจอพรินเตอร์ที่เราอยากจะแชร์กันใช้

Select the printer

Make a right click on the printer icon, the select menu will show up, then select "Printers properties" option. Then we can operate sharing easily.
คลิกขวาที่รูปพรินเตอร์ จะมีป็อปอัพเมนูโผล่ขึ้นมา ให้เราเลือก "Printers properties" ต่อจากนี้ เราก็คงจะปฏิบัติการแชร์พรินเตอร์ได้ไม่ยากแล้ว...

Select : Printer Properties

Click on the "Sharing tab", and we can rename the sharing printer.
เลือกแท็บ Sharing และสามารถเปลี่ยนชื่อพรินเตอร์ที่กำลังจะแชร์ได้ด้วย

Select the Sharing Tab

Select to share


อ้างอิง

07261aom.blogspot.com

วันพฤหัสบดีที่ 20 มิถุนายน พ.ศ. 2556

my school


                                                        my  school
My school is Kanchanapisekwittayalai Suphanburi. She is in Phaikwang Subdistrict,
 Muangsuphanburi District of Suphanburi Province.  
Her location is excellent, because her surroundings are rice paddies. 
So she is free from any unexpected environments and calm enough for living/studying. I
I love and proud of my school and feel that she is my mother. 
 And the children of "Mother Kanchana" are so friendly.


Bird-eye-view of my school (2005), where Suphanburi downtown is at the horizon.


Now "Mother Kanchana of Mine" is the "World Class Standard School" , so English has been integrated to our study.  


Kanchanapisek United


Beautiful Fountain at the Gateway of Kanchanapisek Suphan


Another Bird-eye-View (2005)


Three Main Buildings of Kanchanapisek Suphan


We study hard and hard.


Children of Kanchana are gentle and love to learn. They have been successful.

NOW I AM A SUCCEEDER!!!